Guide to Images
Welcome to JDracolyte's Guide to Editing! In this guide you will find out the basics of adding images, how and what images the Hello Neighbor Wiki admins expect to be uploaded, and more.
Why/When should I upload an image?
Images are crucial to make a wiki look visually pleasing, and so images themselves must be relevant and of the highest possible quality. If there has been a recent announcement about a Hello Neighbor title, there may be new images that accompany that presentation. Or, you may notice that an image that has already been uploaded is lacking appropriate resolution, and you might have a source of a more higher resolution file. Or it could be a much different situation then any of the ones I have listed, and I have seen some weird situations in my days here. But nevertheless, you want an image to be uploaded regardless of why, so I will show you how do it according to this Wiki's rules and Fandom guidelines.
What Images can I upload?
All images are subject to fandom guidelines and rules, as well as this Wiki's rules. Our wiki rules are available here, and Fandom's are available on Fandom.com.
How do I upload an Image?
First things first, you must make sure you have a Fandom account. I go into detail about that in my Guide to Editing, so I won't explain it here. But after that, it's simple really.
Visual Editor
Only logged-in users can upload and edit images through the wiki's Visual Editor. If you want to upload an image directly onto an article (with VisualEditor), simply click the picture icon on the toolbar. Then upload your image, and make sure it is named how you want it. It should then appear on the article. After importing it onto the article, click the edit button after you click on the image, then you can change the size and the image's position on the page.
Source Editor
The source editor is a bit more complicated, and you will first have to go to the Special:NewFiles page on the wiki. Once there, click 'Add new image' on the right, then follow the same steps as if you were adding it with the Visual Editor. Once your image has been uploaded to the wiki, copy it's full name, for example: Thisisanimage.png. Then go back to your article. In the source editor, scroll to where you want to place the image, and type this command:
[[File:YOURPICTURE.png|220px|center|thumb]]
Obviously, you should change YOURPICTURE to the actual name of your picture. If you want to change the size, change the pixel count. For example, make it 500px instead of 220. To change the position, change 'center' to 'left' or 'right'. And if you have done this right, your picture should appear on the page!
How we expect picture layouts to look like
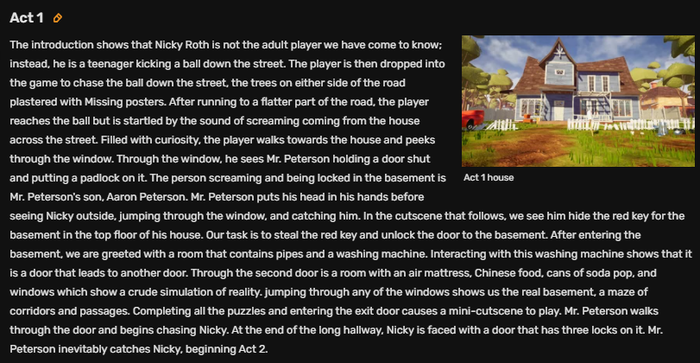
A good example of this would be the Hello Neighbor page. For example:
As you can see, we have a wall of text with an image of the Act 1 house placed neatly on the right, with the text wrapping around it. Images should not be placed in the center of an article, except for in special circumstances (like this one).
What about my user page?
You may upload any picture you wish to your profile page, knowing that if it doesn't follow the rules and ToS you could be banned. Pictures on your user page do not have to be Hello Neighbor or TinyBuild related. Upload and place them however you wish.
Conclusion
Thank you for reading my guide! I will continue to add to it until I have deemed it 'perfect', although with how fast the internet grows that is unlikely. Until next time, JDracolyte out.

